
Nuclear Design Bureau · Game Guides · Guide
Nuclear Design Bureau Guide — Directives, Design, Simulation and Detonation
A Nuclear Design Bureau guide to the Early Access loop: reading directives, using the criticality lab, painting a design and refining a device that fails.
By the New Game Wiki team · Updated 2026-10-04
On this page (9)
- The Four Phases of the Loop
- Using the Criticality Lab Properly
- Designing on the Blueprint Grid
- Sandbox Mode, Saving and Early Access Caveats
- What is the core loop in Nuclear Design Bureau?
- What is the criticality lab for?
- Do directives limit what I can use?
- Is there a sandbox mode?
- How do I stop losing designs when I quit?
A Nuclear Design Bureau guide has to start with the loop, because everything else in this Early Access engineering sim hangs off it. The official description names the cycle plainly: receive a directive, measure it by hand, design it, simulate it, and refine it when it fizzles, fails or wastes material. You play a junior engineer at the Kurchatov Institute with a target from the State and a warehouse of dangerous materials, and your job is to build a device that does what the directive asks rather than a device that simply works.
The Four Phases of the Loop
The store description breaks the loop into specific actions, and each one has a distinct failure mode. Directives supply technical requirements and constraints, some with material limits, so the first phase is reading rather than building. The criticality lab is where you handle parts in first person. The blueprint grid is where you paint materials. The red button is where you find out whether your reasoning was right.
| Phase | What you do | Where it can go wrong |
|---|---|---|
| Receive a directive | Read technical requirements and any material limits | Misreading a constraint wastes a whole build |
| Measure by hand | Use the criticality lab to approach criticality safely | Pushing too far lands the dose on the operator |
| Design | Paint materials onto the blueprint grid; build primary, casing and support systems | Layers fail to stand up to the simulated stresses |
| Simulate | Run full detonation physics in real time | A cheap-looking design can fizzle, fail or waste material |
| Refine | Work out why it failed and change it | Skipping diagnosis and rebuilding blind burns time |
Using the Criticality Lab Properly
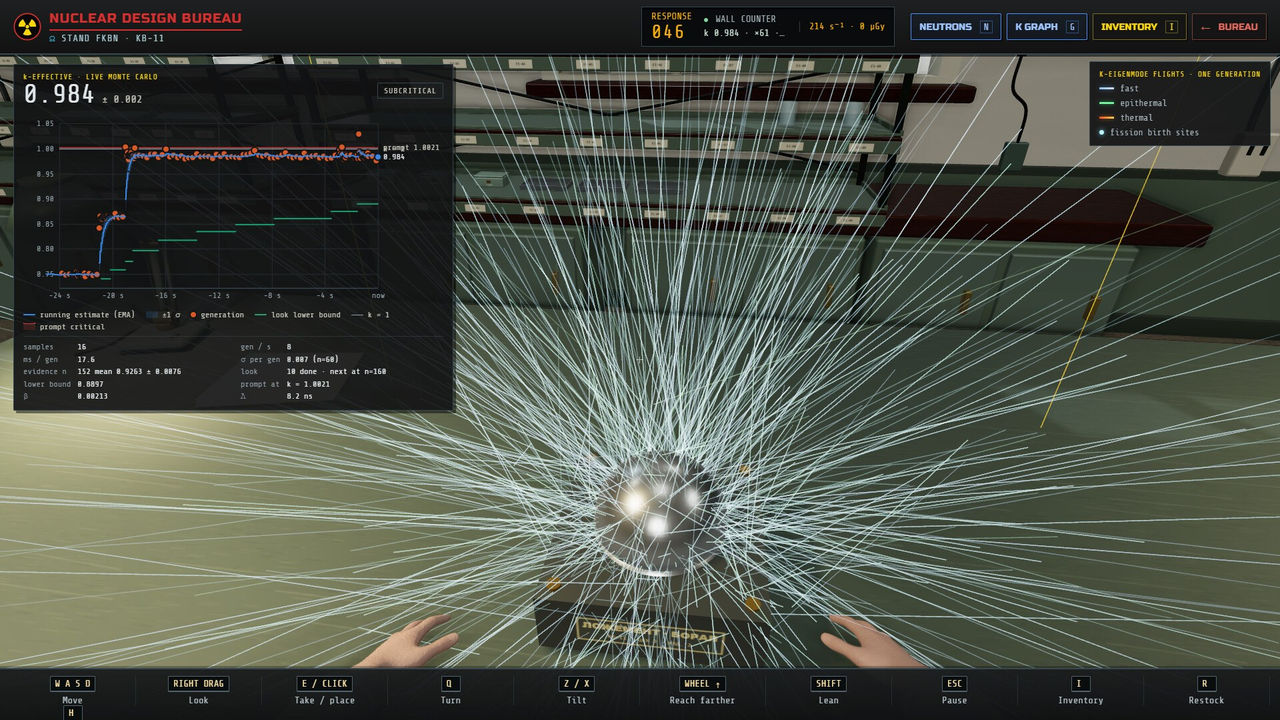
The criticality lab is the most distinctive part of the game and the part with no analogue in a normal building sim. It is a first-person room where you set the core in its cradle and lower the beryllium reflector onto it, watching a counter on the wall while a live Monte Carlo k-effective estimate climbs toward one. The official description notes that the wall counter lags the way the real instrument would, and that radiation exposure shows on the operator rather than in a readout. That framing is the key to the room: the game is asking you to treat your own character as the instrument.
- Approach criticality gradually and watch the trend rather than the instant value, because the counter lags.
- Treat the k-effective estimate climbing toward one as the signal that your assembly is getting hot.
- Track the operator's exposure, since it accumulates on the character rather than on a number.
- Expect the lab to grow: the roadmap lists more to do in the criticality lab as a planned addition.
- Do not treat a failure here as a dead end, because refining is a named phase of the loop.
Designing on the Blueprint Grid
Design is done by painting materials straight onto a grid, and the official description splits a device into the primary, the casing and the supporting systems. What that means in practice is that a working design is a stack of decisions rather than a single part, and the simulation rewards symmetry and layer discipline rather than sheer size.
| Design layer | Documented role |
|---|---|
| Primary | The first stage that starts the reaction |
| Casing | The outer structure and tamper around the device |
| Supporting systems | Everything else a directive's device needs |
| Materials | Painted onto the grid, with some directives limiting your options |
| Grid resolution | Finer resolution for stronger PCs is on the roadmap |
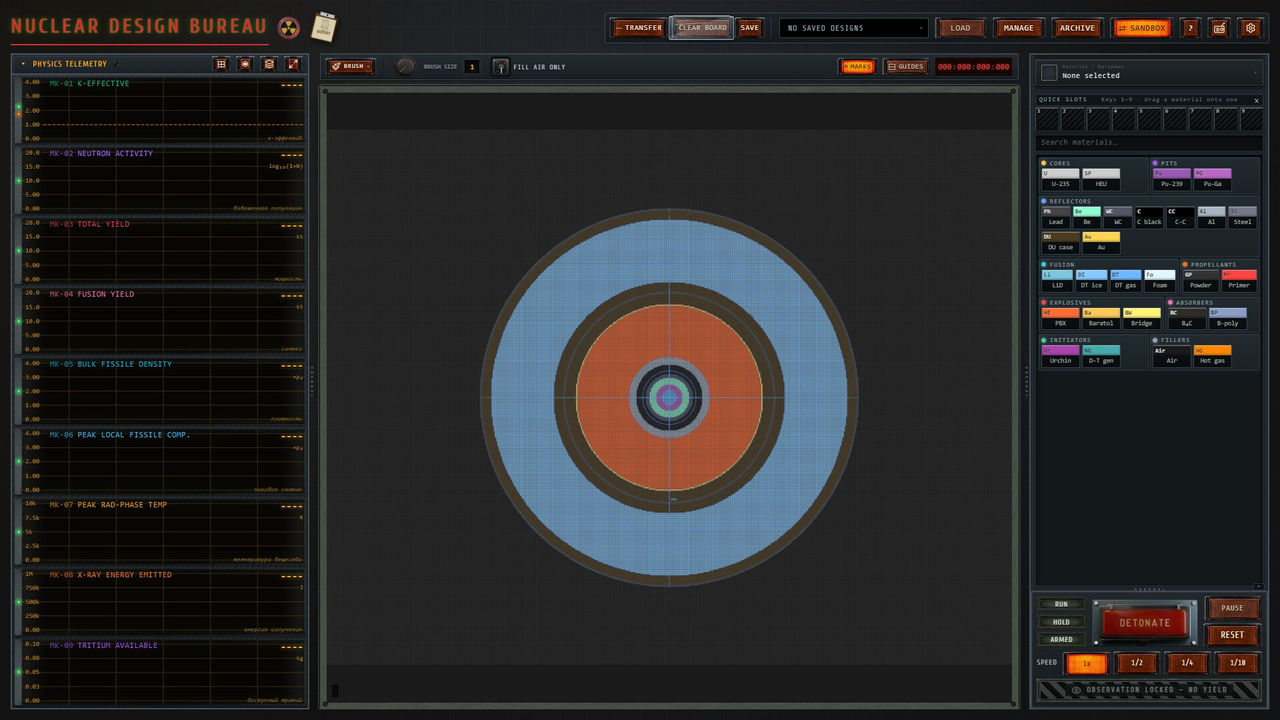
Community design threads add practical detail that the store page does not: layered ellipses can beat box layouts for two-stage devices, and casing thickness matters because it can block what the first stage is supposed to deliver. Those are player findings rather than developer rules, so mark specific numbers to confirm. If a build will not ignite, the tips page collects the reported fixes, and the implosion page explains how the compression step is meant to work in-game.
Sandbox Mode, Saving and Early Access Caveats
Sandbox mode allows unlimited experimentation with full design freedom, which makes it the right place to learn the physics before a constrained directive. It is also where the design files habit saves the most time: a community answer on the Steam discussions says there is a save box at the bottom of the materials menu under the header design files, and saved designs can be loaded from a drop-down at the top of the screen, which matters because designs otherwise do not persist between sessions.
- The current build is playable end to end, with the core loop, criticality lab, sandbox mode, campaign directives and save and load systems all present.
- The developer says the physics, tools and campaign change based on what players build and where they get stuck, so patch notes can change your assumptions.
- The store page carries an explicit Early Access warning about bugs, freezes and crashes, and states that Linux, Proton and macOS are not officially supported yet.
- The page also discloses that AI-assisted images, text and code were used during development, with all content reviewed and edited by the developer.
- A public leaderboard and per-directive efficiency statistics are on the roadmap, not in the build.
The most useful habit in this game is reading the patch notes before trusting a design that used to work. A physics patch changed how fissile material resists compression, which means yields shift, and a later hotfix sped up second-stage burn on big designs. For the version history behind those changes, see the release-date page; for where the community shares designs, see the discord page.
FAQ
What is the core loop in Nuclear Design Bureau?
The official description is explicit: receive a directive, measure it by hand in the criticality lab, design on the blueprint grid, simulate with the red button and refine whatever fizzles, fails or wastes material. That design, simulate, detonate, refine cycle is named as the core gameplay loop of the current Early Access build.
What is the criticality lab for?
It is a first-person room where you handle real parts: you set the core in its cradle, lower the beryllium reflector onto it and watch a wall counter while a live Monte Carlo k-effective estimate climbs toward one. Push it too far and the radiation dose lands on the operator instead of on a readout.
Do directives limit what I can use?
Yes. The game gives you a target and a warehouse of dangerous materials, and some directives limit which materials you are allowed to use on that job, so constraints are part of the brief rather than optional house rules.
Is there a sandbox mode?
Yes. Sandbox mode is listed as a core feature alongside campaign directives, and it allows unlimited experimentation with full design freedom. The campaign provides structured mission progression with technical goals and constraints, while sandbox drops the constraints.
How do I stop losing designs when I quit?
Use the design files feature. A community answer on the Steam discussions states that there is a save box at the bottom of the materials menu under the header design files, and that you can load saved designs from the drop-down menu at the top of the screen.
More in Game Guides
More game guides pages in Nuclear Design Bureau.
- Nuclear Design Bureau Tips — Builds, Simulation Habits and Early Access CaveatsGuideUpdated 2026-10-04
References
- Nuclear Design Bureau on Steam
- Nuclear Design Bureau — Steam Community Hub news and patch notes
- How to save a design in sandbox? — Steam discussion
- Yields and multi-stage designs — Steam discussion
Facts on this page are compiled from the references above. Items marked "to confirm" are single-source and not yet verified.