
Echoes of Mystralia · Gameplay · Guide
Echoes Of Mystralia Gameplay — The Run Loop, Spellcrafting and Shrines
Echoes of Mystralia gameplay explained: the two-spell run loop, spellcrafting, route choices, shrines and the temple progression between runs.
By the New Game Wiki team · Updated 2026-10-04
On this page (8)
- The Core Run Loop
- Spellcrafting Is the Core of the Gameplay
- Route Choices, Shrines and the Difficulty Spike
- What is the core gameplay loop in Echoes of Mystralia?
- How many spells can you equip at once?
- How does spellcrafting work in Echoes of Mystralia?
- What do shrines do in Echoes of Mystralia?
- Does Echoes of Mystralia get harder in the second area?
Echoes of Mystralia gameplay is a fast run-based loop wrapped around a spellcrafting system, and the loop is easy to state: pick two spells, clear rooms, take a boon, choose your next route, then either die or beat the area boss and return to the temple. The depth sits in how much of that run you control, because the spell canvas, the route, and the shrine choices all let you steer the build in different directions. This page walks through the loop, the crafting system, and the optional content, using the credited hands-on review and the official descriptions.
Mechanics here come from a credited Early Access review and a gameplay demo video, with the world and system framing taken from the official store page and site. Single-source details are marked to confirm.
The Core Run Loop
The credited review lays the loop out cleanly. You have two spells selected at any given time, and once you have unlocked all the currently available ones you can swap which two are equipped, mapping them to the X and Y buttons or their equivalents. From there you go area to area, killing enemies with those spells, and when you clear a group you gain a boon of some sort: a charm, a spell modifier, soulbeads, or one of the other currency types. After that you may choose which room to progress into next, repeating until you die or take down the boss of the area. Dying spits you back to the temple to spend whatever you earned, and then you do it all again.
The official store page frames the same structure in narrative terms. You play Mazarim, a Watcher tasked with protecting the Cycle of Memories, explore the lands of Mystralia, meet its lost souls, and face the Shadows of the Past before the world's memory disappears into the Rift. Every journey ends with a return to the Azimuth Temple, where Watchers develop their skills, change their combat approach, and benefit from the permanent progression the run funded.
| Loop step | What happens | What you gain |
|---|---|---|
| Enter an area | Fight through rooms with two spells | Cleared rooms and drops |
| Clear a group | Take a boon | Charm, modifier, soulbeads, or currency |
| Choose a route | Pick from two or three paths | Story beats, upgrades, or a boss |
| Die or win | Return to the temple | Permanent upgrades spent on progress |
The rhythm that follows:
- Treat each room as a resource decision, because the boon shapes the next fight.
- Keep both spell slots active rather than saving one, since the loop is fast.
- Spend currency at the temple rather than hoarding it, because permanent progress persists.
Spellcrafting Is the Core of the Gameplay
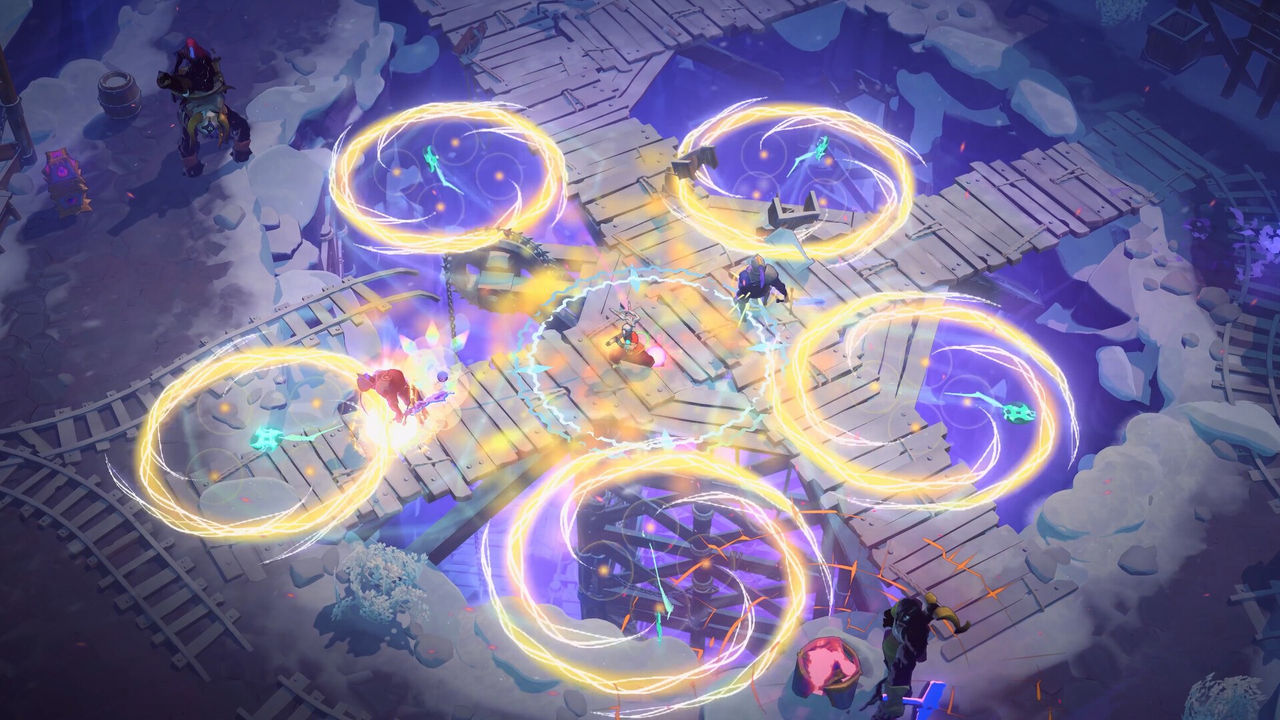
Spellcrafting is the selling point the review itself singles out as what sets the game apart. Every spell has a series of variants that unlock after you have unlocked the four base spells and only if you have enough of the respective currency, and each variant has a number of slots that can be filled with the Memories you pick up. Those Memories can be anything from damage types to buffs to the way a spell is cast, and you can link buffs together to create hefty combos or mix and match to see what unusual spell you can build.
The upgrade path has a clear rule. The review says spell modifier slots can be upgraded within the skill tree, but the modifiers themselves require you to pick up two identical Memories to be beefed up, which the review describes as a neat way of making playthroughs different every time, while also admitting it does not feel dramatically different from other ARPGs of this type. The hands-on feature material adds the scale: at Early Access launch you start with 16 spells and seven magical elements, with more than 100 Memories to build from, over 40 Relics, and around 50 Altar upgrades.
| Crafting element | How it works | Source |
|---|---|---|
| Variants | Unlock after the four base spells plus currency | Credited review |
| Memory slots | Each variant has slots filled with Memories | Credited review |
| Modifier upgrades | Requires two identical Memories | Credited review |
| Relics | Found while exploring, passive for the run | Feature material |
Practical crafting habits from the review:
- Experiment early, because modifiers can be swapped at almost any point in a run.
- Bin annoying abilities once you have survived combat, rather than carrying dead weight.
- Do not expect a perfect build before progressing, since drops are random by design.
Route Choices, Shrines and the Difficulty Spike
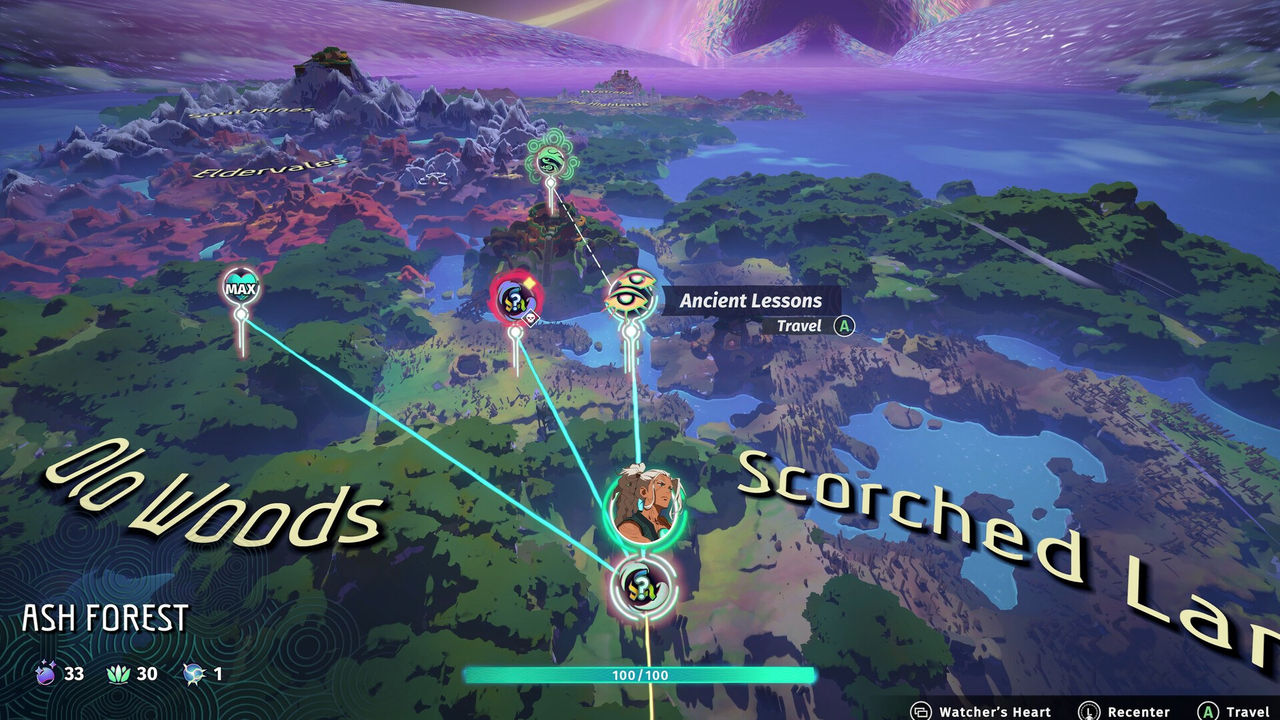
Once you reach the end of an area, the review says you are shown the world map and given a choice of two or three routes, some offering story beats, some upgrades, and others taking you straight to boss fights, with the option to at least see what reward a route offers before committing. That choice is the main way you steer a run, and it is also where the review's sharpest criticism lands: the map symbols are hard to read at first, even though hovering over the overworld does explain them.
Shrines are the optional interruptions that break up combat. The review describes several kinds: some require you to light a candle with the correct element, some want you to fight another wave of enemies, and the reviewer's favourite asks you to solve a small puzzle that creates a shape with light beams connecting circles. Shrines can reward soulbeads or artifacts and charms, and charms require cleansing at the temple before they join the pool of items that can appear in runs. The reviewer also flags a real difficulty spike in the second area, describing tougher enemies that beat them badly and suggesting it may need tuning, while a Steam discussion thread argues the first act guardian is easy, which shows the tuning debate is still open.
| Shrine type | What it asks | Reward type |
|---|---|---|
| Element candle | Light a candle with the correct element | Soulbeads or artifacts |
| Wave fight | Survive another wave of enemies | Charms and currency |
| Light-beam puzzle | Connect circles into a shape | Soulbeads or artifacts |
A short route-and-shrine routine:
- Check the offered reward before entering a branch, since the map shows it.
- Take puzzle shrines when your build is stable, because they break up combat without a fight.
- Expect the second region to hit harder, and spend permanent upgrades before pushing into it.
- Cleansed charms matter long term, so visit the temple rather than skipping the stop.
Performance, Presentation and What to Expect
The review's hardware notes are unusually specific. Most of its playtime was on the Steam Deck, where it reports a solid 60 frames per second with settings on low, and says the low preset does not look noticeably worse than the PC high preset on the small screen, with somewhat lengthy loads on both PC and Deck that the developer said a patch would address. Visually, the review praises the colorful, vibrant style, the per-area color schemes, the spell animations, the enemy designs, and the hand-drawn dialogue frames, and it calls the soundtrack a good mix of high-intensity battle music and relaxing fantasy ambience.
That presentation is part of the gameplay pitch rather than decoration, because the spell spectacle scales with the build. The official site makes the same point in its own words, listing thunderbursts, freezing tornadoes, and fire vortices as examples of what the canvas can produce and describing the system as one that lets you continually refine your fighting tactics. If you want the individual spells ranked, the spells page covers them, the builds page covers the canvas logic, and the map page explains the route symbols the review found hard to read.
In short: two spells, a room-by-room run, a Memory-driven canvas you rebuild constantly, and a temple loop that turns every death into permanent power.
FAQ
What is the core gameplay loop in Echoes of Mystralia?
You carry two spells, move from area to area killing enemies, take a boon such as a charm, a spell modifier, soulbeads, or another currency, then choose which room to enter next. You repeat that until you die or beat the area boss, and dying sends you back to the temple to spend what you earned before starting again.
How many spells can you equip at once?
Two. The credited review says you have two spells selected at any given time, and once you unlock all the currently available ones you can swap which two are equipped between runs, which is why community build advice assigns each slot a different job.
How does spellcrafting work in Echoes of Mystralia?
Each spell has variants that unlock after you own the four base spells and have enough of the relevant currency, and every variant has slots you fill with Memories. Memories can be damage types, buffs, or changes to how the spell is cast, and you can link buffs together into combos. Picking up two identical Memories lets you level that modifier.
What do shrines do in Echoes of Mystralia?
Shrines are optional interruptions inside areas. The credited review describes three kinds: lighting a candle with the correct element, fighting another wave of enemies, and solving a light-beam puzzle that connects circles. They can reward soulbeads, artifacts, and charms, and charms require cleansing at the temple before joining your item pool.
Does Echoes of Mystralia get harder in the second area?
Yes, and reviewers flag it. The credited review says it gets brutal as soon as you hit the second area and calls the difficulty spike a possible reason players stop, while also admitting this may partly be a skill issue. A Steam discussion thread makes the opposite complaint about act one, which suggests the tuning is still being debated.
References
- Echoes of Mystralia Review — This Spellcrafting Roguelite Is WILD (I Dream of Indie)
- Echoes of Mystralia Gameplay Demo (2026) NEW Roguelite Action RPG (Dailymotion)
- Echoes of Mystralia on Steam
- Echoes of Mystralia: Home
Facts on this page are compiled from the references above. Items marked "to confirm" are single-source and not yet verified.